Navigating the initial days following a new tattoo can often be a source of considerable anxiety. Many individuals frequently express frustration over the complex and demanding aftercare routines traditionally recommended by tattoo artists, which often involve constant vigilance, frequent washing, and meticulous moisturizing. This extensive maintenance can feel overwhelming, leading to inconsistent healing outcomes or even compromising the vibrancy and longevity of the body art.
Fortunately, as highlighted in the video above, a more streamlined and highly effective approach to tattoo healing has emerged. This method significantly reduces the daily maintenance burden while simultaneously promoting impeccable healing results. By combining specific products and a precise application schedule, this innovative technique helps individuals achieve perfectly healed tattoos with minimal hassle, ensuring your new ink looks its best for years to come.
Understanding the Initial Stages of Tattoo Healing
The journey of acquiring new tattoos is a profound personal experience, yet the subsequent healing period is equally critical for preserving the artwork’s integrity. Historically, tattoo aftercare regimens have sometimes been perceived as cumbersome, demanding an arduous commitment to prevent complications such as infections or suboptimal ink retention. Traditional methods, while often effective, typically require constant attention, including regular washing and frequent application of balms, which can be challenging to maintain consistently.
Furthermore, without proper guidance, even well-intentioned care can inadvertently lead to issues such as excessive scabbing or premature ink fading. Consequently, understanding the rationale behind each step in the tattoo healing process is paramount. This specialized approach, as detailed in the accompanying video, seeks to mitigate these common frustrations by offering a simpler yet more robust framework for optimal tattoo recovery. It is designed to foster a healing environment that minimizes daily intervention, ultimately leading to superior aesthetic outcomes for your cherished body art.
Essential Supplies for Effective Tattoo Aftercare
Embarking on a successful tattoo healing journey necessitates equipping oneself with the correct tools. The right products are indispensable for safeguarding your new tattoo and promoting a seamless recovery. Therefore, prior to initiating this healing method, ensure you have gathered the following crucial items:
- Aquaphor: This well-known healing ointment is vital for the initial phase of care. Its gentle formula provides a protective barrier and much-needed moisture, supporting the skin’s regeneration without clogging pores.
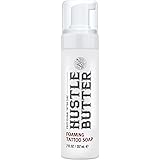
- Unscented Antibacterial Soap: A mild, fragrance-free antibacterial soap is essential for cleansing your tattoo. The absence of perfumes and harsh chemicals prevents irritation, which is particularly important for sensitive, newly tattooed skin.
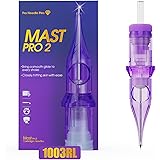
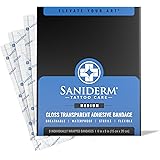
- Second Skin (e.g., Saniderm, Tegaderm, Dermalize): These adhesive, breathable bandages are revolutionary in modern tattoo aftercare. They create a sterile, moist healing environment, protecting the tattoo from external contaminants while allowing the skin to breathe. The video specifically references Saniderm, a popular and effective choice in this category.
- Paper Towels: Clean, disposable paper towels are recommended for drying your tattoo. Unlike cloth towels, they reduce the risk of introducing bacteria and prevent lint from adhering to the delicate skin.
Possessing these specific items ensures that every stage of the healing process can be executed precisely and hygienically. This preparedness is a fundamental step toward achieving beautifully healed new tattoos, circumventing many common aftercare pitfalls.
Day One: The Critical First Steps for Your New Tattoo
The immediate hours following your tattoo appointment are arguably the most crucial for setting the stage for effective tattoo healing. The initial care provided during this period significantly influences the final appearance and health of your new body art. Therefore, meticulous adherence to the following steps is strongly advised.
Removing the Initial Wrapping and Allowing Your Skin to Breathe
Upon returning home from the tattoo studio, the first action to undertake is the immediate removal of the clear wrap applied by your artist. This initial bandage serves a singular, critical purpose: to protect your fresh tattoo from environmental contaminants and bacteria during your transit from the studio to your home. Beyond this initial journey, its protective function diminishes, and prolonged application can actually hinder the optimal tattoo healing process.
Subsequently, it is essential to allow your freshly tattooed skin to relax and breathe for approximately 30 minutes. The tattooing procedure itself is an intensive process, causing considerable trauma to the skin, which manifests as redness and irritation. Allowing the skin this brief period to air out facilitates a reduction in initial inflammation and redness. Furthermore, this pause prepares the skin for the subsequent cleansing steps, ensuring a more comfortable and effective aftercare experience. This period is a foundational element in promoting healthy tattoo recovery.
The Gentle Art of Washing Your Fresh Tattoo
Following the initial air-out period, the next vital step involves thoroughly cleansing your new tattoo. Prior to touching your tattoo, always ensure your hands are meticulously clean. Even seemingly clean hands can harbor unseen bacteria, which pose a significant risk of infection to an open wound like a fresh tattoo. Therefore, washing your hands thoroughly with antibacterial soap and warm water is an indispensable prerequisite.
Once your hands are demonstrably clean, gently wet the tattooed area with lukewarm water. It is important to avoid hot water, as it can be uncomfortable and potentially damaging to sensitive skin, while excessively cold water should also be avoided at this stage. Subsequently, apply a small amount of unscented antibacterial soap to your clean hands, lather it, and then carefully massage the tattoo in circular motions. This technique effectively removes any residual blood, plasma, or excess ink without causing further irritation.
After you are confident that the tattoo is thoroughly clean, rinse it completely with cold water. This cold rinse serves multiple beneficial purposes: it effectively removes all soap residue, soothes the skin, and importantly, helps to close the skin’s pores. Closing the pores can contribute to better ink retention, which is a subtle yet highly effective strategy for preserving the tattoo’s crispness and color vibrancy. This careful washing method is a cornerstone of proper tattoo aftercare.
Drying and Initial Moisturizing with Aquaphor
After the cleansing and rinsing phases are complete, the tattoo must be thoroughly dried. It is imperative to avoid harsh rubbing with a towel, as this can irritate the sensitive skin and potentially disrupt the delicate healing process. Instead, gently pat the tattoo dry using clean, disposable paper towels. Simply lay the paper towel over the tattooed area and allow it to absorb the moisture, repeating this process until the skin is completely dry. This careful approach prevents unnecessary friction and supports the integrity of the newly inked skin.
Once the tattoo is dry, apply a very thin layer of Aquaphor healing ointment. The purpose of Aquaphor on the first day is to provide essential moisture and create a protective barrier against environmental contaminants. It aids in the initial healing by keeping the skin hydrated without suffocating it. It is crucial to emphasize that this Aquaphor application is strictly for the first day only. Excessive or prolonged use of heavy ointments can impede the natural healing process by trapping too much moisture and preventing the skin from breathing adequately. Therefore, this targeted, single-day application is key to initiating effective tattoo healing.
Day Two Onward: Embracing the Second Skin Method
Following the meticulous initial care on day one, the subsequent phase of tattoo healing transitions into a remarkably convenient and effective method utilizing advanced “second skin” bandages. This approach dramatically simplifies daily maintenance while offering superior protection, facilitating excellent healing outcomes.
Why Saniderm on Day Two, Not Immediately?
A common query among individuals new to this healing protocol often revolves around the timing of Saniderm application. It is frequently asked why Saniderm, or any other second skin product, is not applied immediately after the tattoo is completed. The rationale behind deferring its application until day two is critical for preventing potential complications and ensuring optimal healing. Immediately after a tattoo, the skin undergoes a natural physiological response where it “weeps” – a process involving the expulsion of excess plasma, blood, and interstitial fluid.
When Saniderm is applied directly over a freshly tattooed area that is actively weeping, all of these biological fluids become trapped beneath the bandage. This accumulation can create an undesirable environment, potentially leading to irritation, discomfort, and in some cases, an increased risk of infection. The trapped fluid can also compromise the adhesive bond of the Saniderm, making it less effective. Conversely, by following the day one regimen of cleansing and airing out, as outlined previously, the tattoo has an opportunity to calm down significantly. The initial weeping subsides, and any residual blood or plasma is thoroughly washed away, creating a clean, settled surface ideal for Saniderm application. Consequently, applying Saniderm on day two allows for a much more sterile and effective seal, thereby minimizing potential issues and promoting superior tattoo healing.
Applying Your Second Skin for Seamless Tattoo Healing
The application of Saniderm or similar second skin products on day two is a pivotal step for simplified tattoo aftercare. Ensuring clean and dry hands before handling the Saniderm is paramount to prevent the introduction of bacteria to your newly cleansed tattoo. Furthermore, the tattooed area itself must be completely dry, as any moisture can compromise the adhesive bond and create an environment conducive to bacterial growth underneath the bandage. Therefore, after the morning wash on day two, thoroughly pat the tattoo dry and allow it to air dry for an additional few minutes to ensure absolute dryness.
When applying the Saniderm, carefully peel off the backing and gently place the adhesive film over the tattoo, ensuring there are no wrinkles or air bubbles trapped beneath the surface. Smooth the film from the center outwards, pressing firmly to ensure a complete seal around the entire tattoo, with at least an inch of margin around the tattooed area. If the tattoo is located in a difficult-to-reach area, such as the back or shoulder blade, it is highly recommended to seek assistance from a trusted individual. Ensuring their hands are also clean and dry prior to application is crucial. This meticulous application process establishes an effective protective barrier, paving the way for undisturbed tattoo healing.
The Freedom of Saniderm: Up to Five Days of Protection
Once Saniderm is properly applied, it truly transforms the tattoo healing experience. This innovative second skin acts as a protective shield, effectively guarding your new tattoo from external bacteria, dirt, and friction. Consequently, you can resume many normal daily activities with significantly less worry. Showering becomes a non-issue, as the waterproof barrier keeps your tattoo dry and protected. Furthermore, sleeping is considerably more comfortable, eliminating the need to meticulously position yourself to avoid contact with sheets or clothing.
Throughout the period the Saniderm remains on, which should be no more than five days, it is prudent to periodically check the seal. Ensure that no edges have begun to peel back or lift, as this could compromise the sterile environment and expose the tattoo to potential contaminants. If you notice any significant lifting or a breach in the seal, it is advisable to remove the Saniderm, wash the tattoo thoroughly, and apply a fresh piece if feasible, or revert to traditional moisturizing methods. This protective duration is expertly balanced to allow initial healing without prolonging the presence of retained moisture, which could hinder the long-term health of the tattoo.
Removing Saniderm and Continuing Your Tattoo Aftercare Journey
The removal of Saniderm marks another critical juncture in the tattoo healing process. While the second skin offers unparalleled convenience and protection, its removal demands a specific technique to prevent damage to the delicate, newly formed skin and preserved ink. Improper removal is a common error that can unfortunately compromise the healing results.
The Crucial Technique for Saniderm Removal
When it is time to remove your Saniderm, typically after five days, the method employed is paramount. Many people instinctively pull the film upwards, perpendicular to the skin, as one might with a standard adhesive bandage. However, this action is a significant mistake in tattoo aftercare. Peeling the Saniderm straight up can forcefully pull away developing scabs, which are a natural part of the healing process, and regrettably, can even extract ink from your fresh tattoo. Such damage can lead to patchy areas, faded lines, or an uneven appearance, severely diminishing the quality of the artwork.
Instead, the correct technique involves gently pulling the Saniderm downwards, parallel to your skin, as demonstrated in the video. This method allows the adhesive to release more smoothly and less aggressively, minimizing the risk of disturbing the delicate scabs or compromising the ink. It is often helpful to stretch the skin slightly away from the bandage as you pull, further reducing tension. Taking your time and being extremely gentle during this step will protect your tattoo and preserve the integrity of the ink, ensuring the hard work of your artist and your diligent aftercare efforts are not undone. Prioritizing this careful removal prevents unnecessary trauma to the skin, which is vital for the optimal tattoo healing process.
Post-Saniderm Cleansing and Moisturizing
Once the Saniderm has been successfully removed, the tattoo will need another thorough cleansing. Utilizing your unscented antibacterial soap, gently wash the tattooed area as you did on day one, ensuring all adhesive residue and any accumulated plasma beneath the Saniderm are completely removed. Subsequently, pat the tattoo dry with a clean paper towel. Following this, the focus shifts to consistent moisturizing. The skin, having been covered for several days, will greatly benefit from hydration. Applying a thin layer of a gentle, fragrance-free moisturizer is essential.
It is important to acknowledge that even after using Saniderm, some degree of peeling may still occur. This is a natural part of the skin’s regeneration cycle and should not be a cause for concern. If peeling is observed, increase your moisturizing frequency to three to five times a day. Different areas of the body tend to peel more than others, likely due to varying skin thickness, movement, and exposure. For instance, tattoos on joints or areas with constant friction might experience more noticeable peeling. Continual moisturizing during this phase helps to alleviate dryness, reduce itching, and support the final stages of skin recovery, ensuring your new tattoos remain vibrant and healthy.
Long-Term Care for Vibrant Tattoos
The conclusion of the initial tattoo healing process, marked by the cessation of peeling, does not signify the end of your tattoo care journey. To ensure your tattoos retain their vibrancy, sharpness, and overall quality for many years, a commitment to long-term aftercare is imperative. The skin where a tattoo resides continues to benefit from ongoing hydration and protection, which significantly impacts the longevity and appearance of the artwork.
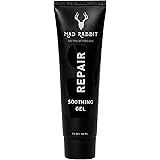
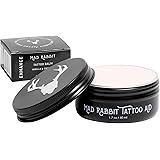
Therefore, once your tattoo has fully healed and the peeling phase has passed, it is highly recommended to transition to a specialized tattoo balm or a high-quality, fragrance-free daily moisturizer. Products like Evolve Tattoo Balm are specifically formulated to nourish tattooed skin, promoting cellular health and protecting the ink from environmental stressors. Consistent daily moisturizing helps keep the skin supple, which in turn maintains the clarity and brilliance of your tattoo. Furthermore, integrating sun protection into your routine is paramount; prolonged exposure to UV rays is the primary cause of tattoo fading. By embracing these long-term aftercare practices, you are not merely preserving ink; you are safeguarding an investment in personal expression, ensuring your new tattoos remain a stunning testament to your journey.
From Wrong to Right: Your Tattoo Healing Questions Answered
What essential items do I need for new tattoo aftercare?
You will need Aquaphor, unscented antibacterial soap, a ‘second skin’ bandage (like Saniderm), and clean paper towels. These items help protect your tattoo and promote proper healing.
What are the first steps for taking care of my new tattoo on day one?
First, remove the initial wrap from the studio and let your tattoo air out for 30 minutes. Then, gently wash it with unscented antibacterial soap, pat it dry with paper towels, and apply a very thin layer of Aquaphor.
Why do I wait until day two to apply a ‘second skin’ bandage like Saniderm?
Waiting until day two allows your tattoo to finish its initial ‘weeping’ of plasma and blood. Applying Saniderm too early can trap these fluids, potentially causing irritation or compromising the bandage’s seal.
How should I remove a ‘second skin’ bandage like Saniderm from my tattoo?
To remove Saniderm, gently pull it downwards, parallel to your skin, rather than pulling straight up. This technique helps prevent damage to the delicate healing skin and preserves your tattoo’s ink.