A recent survey indicates that nearly 40% of event organizers now incorporate personalized elements, such as custom temporary tattoos, to enhance guest engagement and brand recall. The seamless creation of such bespoke items, particularly using inkjet printable temporary tattoo paper, is meticulously showcased in the video positioned above. This guide will delve deeper into the intricate processes and expert techniques required to transform digital designs into vibrant, skin-safe custom tattoo stickers, ensuring a professional finish every time.
Precision and an understanding of material science are paramount when working with specialized media like temporary tattoo paper. The initial steps, including design conceptualization and printer calibration, significantly influence the final product’s quality. Furthermore, an expert-level grasp of these nuances is what differentiates a passable temporary tattoo from a truly remarkable custom sticker. Therefore, adherence to established best practices becomes non-negotiable for superior results.
Mastering Inkjet Printable Temporary Tattoo Paper for Custom Designs
The journey from a digital concept to a tangible custom temporary tattoo involves several critical stages, each demanding meticulous attention. Utilizing inkjet printable temporary tattoo paper effectively requires more than just loading the paper into a printer; it necessitates a comprehensive understanding of the entire workflow. This process is akin to sculpting a masterpiece, where each cut and contour contributes to the ultimate aesthetic value. Expert practitioners consistently emphasize the foundational importance of preparatory steps for achieving high-fidelity tattoo stickers.
Consideration must be given to the specific properties of the chosen tattoo paper and the capabilities of your inkjet printer. The symbiosis between these components directly impacts the vividness and longevity of the temporary tattoo. Moreover, minor adjustments in printer settings or design resolution can yield profoundly different outcomes. Thus, a methodical approach is always recommended when embarking on custom tattoo sticker projects.
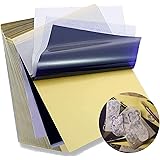
Understanding the Substrates: Clear vs. White Inkjet Temporary Tattoo Paper
The selection of either clear or white inkjet printable temporary tattoo paper represents a fundamental decision that profoundly impacts the final aesthetic of custom tattoo stickers. Each substrate possesses distinct characteristics, catering to different design requirements and desired effects. Clear paper, often likened to a transparent film on the skin, allows the skin tone to show through non-printed areas. This option is ideally suited for designs featuring intricate linework or graphic elements intended to appear directly on the skin’s surface, mimicking traditional tattoos.
Conversely, white temporary tattoo paper provides an opaque base, ensuring that colors are vibrant and true, irrespective of the underlying skin tone. This opaque quality is invaluable for designs that incorporate white elements or require complete color saturation, similar to applying paint to a canvas. The white background prevents any skin pigmentation from diluting the design’s hues, offering a more vivid and solid appearance. Therefore, careful consideration of the design’s specific chromatic needs is essential when choosing between these two critical types of tattoo paper.
Design Principles for High-Quality Custom Tattoo Stickers
Crafting compelling designs for custom tattoo stickers necessitates an understanding of specific graphic principles tailored for this medium. Foremost among these is the imperative to mirror or reverse your image prior to printing. This step ensures that the design appears correctly oriented once transferred to the skin, much like reading a reflection in a looking-glass. Neglecting this crucial action often leads to unsatisfactory and incorrectly oriented tattoos.
Furthermore, attention to resolution and color vibrancy is paramount; a minimum of 300 DPI is generally recommended for crisp, clear lines and vibrant colors. The design’s overall complexity should also be evaluated against the intended size of the tattoo. Intricate details, while appealing on screen, may become muddled or lost during the transfer process if printed too small. Therefore, simplifying designs or opting for larger dimensions often yields superior results for inkjet printable temporary tattoos.
Optimizing Your Inkjet Printer Settings for Flawless Transfer
Achieving impeccable custom tattoo stickers hinges significantly on the precise configuration of your inkjet printer settings. Optimal printer calibration is analogous to fine-tuning a precision instrument; every parameter must be set correctly for peak performance. It is generally advised to select the highest print quality setting available, often labeled “photo paper” or “best quality,” to maximize ink saturation and detail. This ensures that the intricate aspects of your design are rendered with absolute clarity.
Additionally, the correct paper type must be designated within the printer’s software, often corresponding to “glossy photo paper” or “specialty paper.” This selection optimizes ink disbursement and drying times, preventing smudging and ensuring a uniform transfer. Experimentation with ink levels and color profiles may also be necessary to achieve perfect chromatic accuracy, especially when working with specific brand guidelines or pantone colors. These adjustments collectively contribute to a truly flawless application of the custom tattoo design.
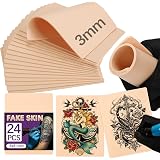
The Meticulous Application Process of Temporary Tattoos
The successful application of inkjet printable temporary tattoo paper to skin is a multi-step process that demands patience and precision. Once printed and cut, the clear protective film is carefully peeled away, exposing the adhesive layer and printed design. This action prepares the tattoo for its transfer, revealing the ready-to-adhere surface. The prepared tattoo is then placed design-side down onto clean, dry skin, ensuring the desired positioning is achieved.
A damp cloth or sponge is subsequently pressed firmly and evenly onto the backing paper for approximately 30-60 seconds. This step facilitates the transfer of the design by allowing the water to penetrate the paper, activating the adhesive, and releasing the design onto the skin. The backing paper is then gently peeled away, revealing the transferred image. This method, often compared to a delicate decal application, ensures the custom tattoo sticker adheres smoothly and without distortion.
Ensuring Durability and Longevity for Custom Temporary Tattoos
Maximizing the durability and longevity of custom temporary tattoos involves several considerations, extending beyond the initial application. The quality of the inkjet printable temporary tattoo paper itself plays a foundational role; premium papers are formulated with superior adhesion and water resistance. Furthermore, the selection of appropriate inks—often dye-based for vibrant colors and good adhesion—can significantly influence how well the tattoo withstands daily wear.
Post-application care is also critical; the area should be kept dry for several hours after transfer, allowing the adhesive to fully set. Avoid harsh scrubbing, excessive friction, or direct contact with oils and lotions, which can degrade the tattoo’s integrity. Some users also opt for a light dusting of translucent setting powder over the applied tattoo to further seal and protect the design. By observing these practices, the lifespan of custom tattoo stickers can be notably extended, ensuring the design remains pristine for longer.
Beyond the Basics: Advanced Applications and Business Prospects
The utility of inkjet printable temporary tattoo paper extends far beyond simple personal adornment, opening avenues for advanced applications and robust business opportunities. Entrepreneurs often leverage custom temporary tattoos for event branding, promotional giveaways, or as unique merchandise. Imagine a music festival offering attendees personalized tattoos with the band’s logo; this creates memorable experiences and acts as an effective marketing tool. Such applications underscore the versatility of this medium in diverse commercial contexts.
Furthermore, designers utilize these materials for prototyping skin art or testing design concepts without permanent commitment. Small businesses and crafters can offer bespoke temporary tattoos for children’s parties, corporate events, or even artistic collaborations, providing a custom touch that is both unique and engaging. The market for personalized custom tattoo stickers continues to expand, driven by a desire for individuality and creative expression across various sectors.
From Paper to Skin: Your Inkjet Tattoo Q&A
What is inkjet printable temporary tattoo paper?
Inkjet printable temporary tattoo paper allows you to create custom, skin-safe temporary tattoos using your own digital designs and an inkjet printer. It transforms your images into stickers that can be transferred onto the skin.
What are the main types of temporary tattoo paper available?
There are two main types: clear and white. Clear paper lets your skin tone show through non-printed areas, while white paper provides an opaque background for vibrant, solid colors.
Is there a special step I need to take with my design before printing?
Yes, you must mirror or reverse your image prior to printing. This crucial step ensures the design appears correctly oriented once transferred onto your skin.
How do I apply a temporary tattoo made with this paper?
First, peel off the clear protective film and place the design face down on clean, dry skin. Then, press a damp cloth firmly onto the backing paper for 30-60 seconds before gently peeling the paper away.
How can I make my custom temporary tattoos last longer?
To extend the tattoo’s life, keep the area dry for several hours after application to let the adhesive set. Additionally, avoid scrubbing, excessive friction, and contact with oils or lotions on the tattooed area.