Mastering Tattoo Line Work: Precision from Start to Finish
Creating crisp, consistent lines is perhaps the most fundamental skill in tattooing. It requires a delicate balance of control, understanding your equipment, and thoughtful preparation. The video highlights starting from the bottom corner and working upwards, a clever tactic that many seasoned artists employ to maintain stencil integrity.This upward motion is like painting with a fragile outline; it ensures you don’t inadvertently wipe away your guide with your hand or excess ink as you progress. Furthermore, remember that the stencil is your map, and preserving it is paramount to the final design’s accuracy. A well-applied stencil adheres firmly, allowing you to focus on the tattoo machine’s movement rather than worrying about your guide disappearing.
The Role of Lubrication and Cleanliness
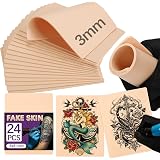
Before the needle even touches the canvas, preparation is key. Applying a thin layer of tattoo lubricant, such as Vaseline mentioned for fake skins, serves multiple purposes. It creates a smooth surface for the needle to glide, reducing friction and allowing for a more fluid line.Think of it as oiling a complex machine; everything moves more efficiently. Moreover, this lubricant acts as a barrier, collecting excess ink and preventing it from smearing across your intricate stencil. This simple step keeps your workspace clean and your reference clear.
As you pull each line, the video’s advice to dab rather than wipe is crucial. Wiping can be abrasive, potentially removing your stencil or pushing ink into areas where it doesn’t belong. Dabbing gently lifts away the excess ink, preserving the crispness of your lines and ensuring your canvas remains clean without disturbing your initial guide.
Needle Selection and Voltage for Flawless Lines
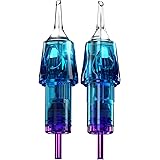
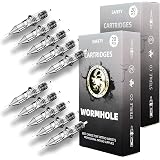
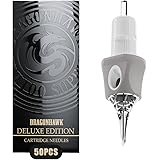
The choice of needle and appropriate voltage settings dramatically impacts your line work. The video mentions using a “nine round liner from Bronc” at “eight volts” for lining. A round liner needle configuration is designed to create sharp, defined lines. The individual needles are tightly grouped in a circular pattern, making them ideal for precise outlines and details.Adjusting voltage for different tasks is a hallmark of professional technique. Eight volts, for instance, provides the necessary speed and power for the needle to penetrate the skin efficiently and deposit ink consistently. It’s a balance: too low, and the line might be weak or inconsistent; too high, and you risk overworking the skin and causing unnecessary trauma.
Your goal is flawless lines—meaning lines that are fully saturated and complete, with no breaks or “skipped” areas. This requires consistent hand speed, steady pressure, and ensuring your needle is always adequately saturated with ink. Achieving this consistency takes considerable practice, much like a sculptor learning to apply even pressure to mold clay.
Mastering Tattoo Shading: Adding Depth and Dimension
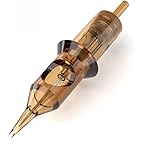
Once your foundational line work is complete, **shading** brings the tattoo to life, adding depth, texture, and visual interest. Shading is a distinct skill set that requires a different approach to both your machine and your technique. The video guides us into using a “thirteen curved mag from Bronc” at “6.5 volts” for this stage.A curved magnum (or “curved mag”) needle is an artist’s best friend for smooth **blending techniques**. Unlike flat or straight magnum needles, a curved mag has its needles arranged in an arc, which helps prevent harsh lines and allows for softer, more even ink distribution. This is essential when creating subtle gradients or smooth transitions in color.
Understanding Voltage and Hand Speed for Shading
The voltage setting for shading is typically lower than for lining, as demonstrated by the “6.5 volts.” This reduced power allows for a softer impact on the skin, facilitating a more gradual deposit of ink. Think of it as painting with a lighter touch; you’re building up layers of color rather than drawing a solid line.Your hand speed is another critical variable when **shading**. Too fast, and you might leave patchy, undersaturated areas; too slow, and you risk overworking the skin, leading to potential scarring or blowouts. Adjusting your hand speed in harmony with your voltage and needle type is akin to a musician finding the perfect tempo for a melody—it dictates the flow and quality of the output.
Whip Shading and Cross-Hatching Techniques
The video details whip shading, a technique where you push away from yourself and gradually tilt the machine upwards as you pull out of the skin. This motion creates a soft, feathered edge, ideal for smoke effects, gradients, or areas where you want a smooth transition from dark to light. It’s like a brush stroke where the pressure lessens at the end, leaving a lighter mark.Furthermore, cross-hatching is a powerful method for achieving smoother blending and consistent saturation. This involves layering shading strokes in different directions, often perpendicular to each other. Imagine weaving threads to create a dense fabric; each overlapping stroke contributes to a seamless texture. By employing both whip shading and cross-hatching, **new tattoo artists** can achieve a wide range of textural and tonal effects, significantly enhancing the final tattoo artistry.
Remember, practice is the secret ingredient for mastering these tattoo techniques. Consistent time spent on fake skin refining your hand speed, pressure, and understanding of your equipment will translate directly into improved results on real skin. The journey from aspiring artist to master tattooist is paved with countless hours of deliberate practice and an unwavering commitment to learning the **tattoo basics**.
Sticking the Landing: Your Tattoo Basics Q&A for Aspiring Artists
What are the two main techniques a new tattoo artist should focus on learning first?
New tattoo artists should focus on mastering line work to create crisp outlines and shading techniques to add depth and dimension to their designs.
Why is it recommended to work from the bottom corner upwards when creating tattoo lines?
Working upwards helps prevent you from accidentally wiping away your stencil with your hand or excess ink as you progress with the tattoo, preserving your guide.
What kind of needle and voltage is typically used for creating tattoo lines?
For tattoo line work, a round liner needle configuration is commonly used. Artists often set their machine voltage around 8 volts to achieve sharp, defined lines.
How does the equipment and voltage differ when you are doing shading compared to lining?
For shading, a curved magnum (mag) needle is often preferred for smooth blending, and the voltage is typically lower, around 6.5 volts, allowing for a softer and more gradual ink deposit.