Getting a new tattoo is an exhilarating experience, a moment where a piece of art is permanently etched onto your skin. However, the journey doesn’t end when you leave the tattoo studio. As the insightful video above demonstrates, proper tattoo aftercare is absolutely critical for ensuring your new ink heals beautifully, vibrant, and free from complications. Many individuals underestimate the importance of diligent aftercare, often leading to faded designs or even infections. The first few weeks are paramount, setting the stage for how your tattoo will look for years to come.
My own first tattoo taught me a tough lesson about aftercare. I diligently followed basic instructions but skipped some crucial steps, resulting in a healing process that was longer and more uncomfortable than it needed to be. Learning from that experience, I realized that understanding the ‘why’ behind each step is as important as knowing the ‘how.’ This detailed guide expands upon the video’s excellent advice, providing a comprehensive roadmap for optimal tattoo healing, ensuring your new masterpiece receives the care it deserves.
Essential Supplies for Optimal Tattoo Aftercare
Before you even remove your initial wrapping, gathering the right tools makes the entire aftercare process significantly smoother. Having everything within reach prevents unnecessary scrambling and potential contamination. Your designated cleaning station, whether it is a sink or a spacious shower, should be meticulously prepared for hygiene. The cleanliness of your environment directly impacts the healing outcome of your new tattoo.
- Gentle Cleansing Soap: Opt for an unscented, antibacterial, or sensitive skin soap. Dove Sensitive Skin bar soap is a popular choice, as mentioned in the video, effectively cleaning without harsh chemicals. Liquid antibacterial soaps are also excellent for minimizing cross-contamination risks during application.
- Quality Healing Ointment: The market offers many specialized tattoo healing balms, but simpler options like Aquaphor or other petroleum-based ointments work effectively. The key is finding a product that provides a protective barrier without suffocating the skin. Always check ingredients for potential allergens.
- Clean Paper Towels: Absorbent and sterile paper towels are essential for gently dabbing your tattoo dry. Unlike cloth towels, paper towels are disposable, thus eliminating the risk of introducing bacteria to your sensitive skin. Approximately two to three sheets are usually needed per cleaning session.
- Lukewarm Running Water: Ensure easy access to a comfortable water temperature. Water that is too hot or too cold can shock the delicate skin around your new tattoo, potentially causing irritation or discomfort.
The Initial Cleanse: A Critical First Step
The very first cleaning of your new tattoo is perhaps the most significant, establishing a foundation for proper healing. After carefully removing the initial dressing applied by your artist, which could be Saran wrap or a medical pad, you will observe a “slimy” residue. This is a natural part of the healing process, composed of plasma, excess ink, and dried blood. It is important not to panic when encountering this discharge.
Preparing for Your First Wash
Start by thoroughly washing your hands with antibacterial soap for at least 20 seconds. This crucial step prevents the transfer of any germs or bacteria from your hands directly onto the open wound of your tattoo. Maintaining impeccable hand hygiene is the cornerstone of preventing infection. Adjust the water temperature to a comfortable lukewarm setting, ensuring it is gentle on your sensitive skin. This helps avoid irritating the area, making the cleaning process much more pleasant.
Gently Cleansing the Tattoo
Allow the lukewarm water to flow over your new tattoo, gently rinsing away the initial layer of plasma and blood. The video suggests cupping water in your hands and letting gravity assist, which can be less abrasive than direct water pressure. This initial rinse helps to loosen the thick, gunky discharge without causing any undue stress to the healing skin. You will observe the tattoo becoming more visible as the residue washes away, revealing the vibrant colors beneath.
Next, apply a dime-sized amount of your chosen antibacterial soap into your clean hands, working it into a light lather. Gently apply this lather to your tattoo using circular motions, covering the entire tattooed area. Do not scrub vigorously; the goal is to carefully remove any remaining plasma, blood, and excess ink. It’s completely normal to see more discharge come off during this step. Perform this gentle cleaning two to three times, ensuring all areas of the tattoo are thoroughly addressed. Once the plasma stops appearing, the tattoo should be sufficiently clean.
Drying and Moisturizing: The Protective Phase
After your tattoo is thoroughly cleaned, the next critical steps involve careful drying and the precise application of healing ointment. These actions create a protective barrier, fostering a healthy environment for your skin to recover. The method of drying and moisturizing directly impacts the comfort and efficacy of the healing process.
The Art of Pat Drying
Turn off the water and retrieve several clean paper towels. Gently pat the entire tattooed area dry, absorbing any residual moisture. Avoid rubbing, as this can irritate the sensitive skin, dislodge scabs, or even pull out ink. You may still see a slight discharge on the paper towel, which is normal and indicates thorough cleaning. The video wisely advises leaving the tattoo just slightly damp before applying ointment. This technique allows the ointment to glide on more smoothly, ensuring an even and thorough application across the skin.
Leaving a touch of moisture can also help the ointment create a better occlusive barrier, trapping essential hydration within the skin. This prevents excessive dryness and cracking, common issues that can hinder optimal healing. A completely dry surface can make ointment application feel sticky and less effective, leading to uneven coverage.
Applying Healing Ointment for Protection
Now, it’s time for the healing ointment. The video highlights a refined method: applying dime-sized dabs of ointment in various spots across the tattoo rather than one large glob. This technique, the “dabbing method,” facilitates much faster and more even distribution. After dabbing, gently spread the ointment with your clean fingertips, using light, circular motions until it forms a thin, protective layer. Remember, less is often more when it comes to ointment application.
The primary goal is to create a breathable barrier, not to suffocate the skin. Applying too much ointment can clog pores, preventing the tattoo from breathing properly and potentially leading to breakouts or even infection. A thin layer provides adequate moisture and protection against environmental contaminants without hindering the skin’s natural healing processes. This careful balance is crucial for vibrant tattoo healing.
Beyond the Initial Care: Long-Term Healing Strategies
The initial cleaning and moisturizing regimen establishes a strong foundation, but consistent care is vital throughout the entire healing period. Adapting your routine as the tattoo progresses through different stages ensures its longevity and aesthetic quality. Paying close attention to your skin’s signals will guide your ongoing aftercare approach.
Frequency and Air Exposure
Maintain this cleaning and ointment application routine approximately three times a day for the first few days. Consistency during this crucial period helps prevent bacterial buildup and keeps the tattoo adequately moisturized. A significant departure from older methods, as noted in the video, is the recommendation against re-wrapping your tattoo with Saran wrap. Allowing the tattoo to breathe promotes better healing and reduces the risk of moisture trapping, which can foster bacterial growth.
Instead, choose loose-fitting, breathable clothing, like a baggy t-shirt over an arm tattoo, to act as a gentle protective barrier against external elements. This approach minimizes friction and allows air circulation, which are both essential for optimal skin recovery. Avoiding restrictive clothing also prevents irritation and ensures the tattoo remains comfortable throughout the day.
Transitioning to Moisturizer and Beyond
Around the third or fourth day, you will likely observe your tattoo beginning to peel, similar to a sunburn. This is a normal and healthy part of the healing process, indicating that the top layer of damaged skin is shedding. At this stage, it is time to transition from healing ointment to a non-scented, fragrance-free moisturizer. Products free from perfumes and dyes are less likely to irritate the sensitive, regenerating skin.
Continue applying the moisturizer twice a day, or even once a day, depending on how dry your skin feels. Keeping the tattoo hydrated during the peeling phase helps minimize itching and supports the ongoing regeneration of skin cells. Hydration is key to preserving the integrity of the ink and promoting a smooth, even heal. Proper moisturization can also enhance the tattoo’s overall appearance and longevity, making colors pop.
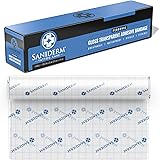
Exploring Advanced Healing Methods: Saniderm and Second Skin
While traditional aftercare methods are highly effective, innovations like Saniderm or “second skin” dressings offer an alternative, often hands-off approach to tattoo healing. These specialized adhesive bandages create a sterile, moist healing environment, eliminating many of the daily cleaning steps. These products are gaining popularity for their convenience and ability to promote faster healing with reduced scabbing.
These medical-grade films are typically applied by your tattoo artist immediately after the session and can remain on the skin for several days, often up to a week. They are waterproof, allowing for showering, and protect the tattoo from bacteria while allowing the skin to breathe. The fluid that accumulates underneath, often mistaken for an issue, is actually a beneficial mix of plasma and ink that helps facilitate the healing process. Many individuals find that using Saniderm results in a smoother, less itchy heal, significantly simplifying the initial aftercare routine. Consult with your tattoo artist about whether this method is suitable for your specific tattoo and skin type, as it can be a game-changer for new tattoo care.
Unlocking Amazing Heals: Your Tattoo Aftercare Q&A
Why is it important to take care of a new tattoo?
Proper aftercare is critical for ensuring your new tattoo heals beautifully, remains vibrant, and avoids complications like fading or infections. The first few weeks are paramount for its long-term appearance and health.
What essential supplies do I need for new tattoo aftercare?
You will need a gentle, unscented antibacterial or sensitive skin soap, a quality healing ointment (like Aquaphor), clean paper towels, and access to lukewarm running water.
How do I clean my new tattoo for the very first time?
After washing your hands, gently rinse the tattoo with lukewarm water. Then, apply a dime-sized amount of gentle soap and softly clean the entire tattooed area using light, circular motions two to three times until all discharge is gone.
How should I dry my new tattoo and apply healing ointment?
Gently pat the entire tattooed area dry with clean paper towels, leaving it just slightly damp. Next, apply a thin, even layer of healing ointment using dime-sized dabs and gently spreading it with clean fingertips.
How often should I clean and moisturize my new tattoo?
Maintain this cleaning and ointment routine approximately three times a day for the first few days. It’s important to allow the tattoo to breathe and avoid re-wrapping it with Saran wrap.