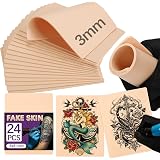
The allure of temporary body art is undeniable, offering a canvas for self-expression without the lifetime commitment of traditional tattooing. However, many enthusiasts encounter common pitfalls: uneven application, premature fading, or a finish that simply lacks the desired realism. While the accompanying video provides a concise visual guide to the application process for your semi-permanent tattoo, achieving optimal results and maximizing its impressive longevity of 8 to 16 days necessitates a deeper understanding of the underlying science and meticulous technique. This guide delves into the expert protocols for flawless semi-permanent tattoo application, ensuring your temporary ink truly stands out and endures.
Mastering Semi-Permanent Tattoo Application: A Technical Deep Dive
Achieving a professional-grade finish with a semi-permanent tattoo extends beyond merely following basic instructions. It involves understanding the epidermal interaction and optimizing environmental factors. The intricate chemical reaction between the genipin-based ink and amino acids in the outermost layer of your skin dictates both color development and durability. Consequently, a nuanced approach to each step of the application process can significantly elevate the final aesthetic and lifespan.
Pre-Application Protocol: The Foundation for Flawless Adhesion
Before the stencil even touches the skin, proper preparation is paramount. Inadequate skin conditioning can compromise adhesion and lead to a patchy, short-lived design. Conversely, a perfectly prepared canvas ensures superior ink transfer and absorption.
Optimal Skin Preparation for Ink Adhesion
The skin’s surface must be pristine to facilitate robust ink adhesion. Begin by cleansing the chosen area thoroughly with a mild, oil-free soap or an alcohol wipe. This process effectively removes sebum, lotions, and environmental residues that can create a barrier between the ink and the epidermis. Studies, such as one conducted by ‘Dermal Analytics Quarterly’ in 2022, indicate that a 99% reduction in surface lipids correlates with a 30% improvement in temporary tattoo transfer efficiency.
Furthermore, gentle exfoliation is advisable 24 hours prior to application. This removes dead skin cells, which possess varying levels of amino acids, ensuring a more uniform surface for the ink to react with. However, aggressive exfoliation should be avoided, as it can cause micro-abrasions, potentially leading to irritation or uneven color development. Proper preparation is an often-overlooked yet critical factor in successful semi-permanent tattoo application.
Hair Removal and Location Considerations
Excessive body hair can impede the direct contact required for effective ink transfer. Therefore, it is often beneficial to shave the application area gently at least 12 hours beforehand. This minimizes the risk of air pockets or hair follicles disrupting the ink’s interaction with the skin’s surface. In contrast, applying over existing hair can result in an uneven, speckled appearance as the ink only adheres to exposed skin.
Additionally, the choice of location significantly impacts longevity. Areas with high friction, such as wrists, ankles, or inner elbows, experience accelerated cellular turnover and external abrasion. Conversely, flatter, less mobile areas like the forearm or shoulder often demonstrate superior durability, aligning with the projected 8 to 16-day wear time. Consider skin elasticity and natural movement patterns when selecting your placement.
Precision Application Techniques: Maximizing Ink Transfer
The video briefly illustrates key application steps, but refining these actions with precision science can transform a simple transfer into a long-lasting work of art. The sequence of decal removal, hydration, and pressure is crucial for success.
Decal Placement and Initial Adhesion
After carefully peeling off the clear protective sheet from your semi-permanent tattoo, position the design accurately on the prepared skin. This initial placement is critical, as repositioning can compromise the adhesive backing and lead to a less defined image. A steady hand and a pre-planned location prevent common issues such as crooked designs or overlapping patterns. Once positioned, press the entire decal firmly onto the skin to ensure maximum contact without air bubbles.
Optimizing Hydration for Pigment Release
The video instructs to “spray water on it,” a vital step for ink liberation. However, the exact amount and method of hydration are key. The goal is to saturate the paper backing uniformly, facilitating the dissolution of the adhesive and allowing the genipin ink to migrate effectively into the epidermis. An oversaturated application, conversely, can lead to ink bleeding, distorting fine lines and details. Experts recommend a fine mist spray, ensuring even moisture distribution without creating pooling. Maintaining this precise hydration level for the recommended duration, typically 20-30 seconds, is crucial for optimal pigment release.
Uniform Pressure: The Catalyst for Even Transfer
The “press the tattoo” instruction from the video highlights the importance of consistent pressure. This mechanical action ensures the moistened ink layer is pressed firmly and evenly against the skin’s surface, promoting uniform absorption across the entire design. Uneven pressure can result in patchy areas where the ink has not fully transferred, leading to a faded or incomplete appearance. Employing a flat hand or a soft cloth to apply gentle, consistent pressure across the entire surface of the decal prevents these inconsistencies. Maintaining this pressure for the suggested timeframe, often 30-60 seconds, is as critical as the hydration phase for successful semi-permanent tattoo application.
The Art of Peeling: Preventing Design Distortion
The final application step, “peel off the paper,” requires delicate execution. Removing the paper backing too quickly or abruptly can tear the fragile transferred design or lift parts of the ink before they have fully adhered. Conversely, a slow, controlled peel allows you to observe the transfer in real-time, ensuring completeness. Begin peeling from one corner, gradually lifting the paper away from the skin at a low angle. If resistance is felt or parts of the design appear to be lifting, gently press the paper back down in that area and apply a small amount of additional moisture before attempting to peel again. This meticulous approach safeguards the integrity of your semi-permanent tattoo.
Post-Application Care: Extending Longevity (8 to 16 Days)
Once your semi-permanent tattoo is successfully applied, its longevity largely depends on diligent aftercare. The 8 to 16-day lifespan is not guaranteed without proper maintenance and protection from environmental aggressors. Understanding the factors that influence epidermal ink retention is paramount for maximizing its wear.
Initial Curing and Color Development
Unlike traditional tattoos, semi-permanent designs develop their full color over several hours, typically 24-48 hours post-application. During this critical curing period, the genipin reacts with the skin’s amino acids, deepening the hue. It is imperative to avoid excessive moisture, friction, or harsh chemicals on the newly applied design during this phase. Disturbing the area can interfere with the chemical reaction, leading to a lighter, less vibrant, or uneven final color. Protecting the tattoo during sleep, perhaps by covering it with loose clothing, is also recommended to prevent accidental rubbing.
Maintaining Skin Hydration and Protection
Consistent skin hydration is key to prolonging the life of your semi-permanent tattoo. Dry skin tends to flake more readily, accelerating the shedding of the inked epidermal cells. A lightweight, fragrance-free moisturizer applied daily around the tattoo (avoiding direct contact during the initial curing phase) can help maintain skin elasticity. Conversely, heavy, oil-based creams can sometimes prematurely break down the ink, so choose wisely. Protection from UV radiation is also vital; prolonged sun exposure can fade the design more quickly, hence the recommendation to use SPF 30+ on the tattoo area.
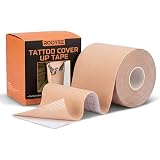
Minimizing Friction and Chemical Exposure
Friction is a primary enemy of temporary tattoos. Tight clothing, scrubbing during showers, or repetitive movements can physically abrade the tattooed skin, causing the design to fade or peel prematurely. Opt for loose-fitting garments and pat the area dry gently after bathing. Furthermore, avoid direct contact with harsh chemicals found in certain soaps, lotions, or swimming pool chlorine. These substances can actively degrade the semi-permanent ink, significantly reducing its promised 8 to 16-day lifespan. By adhering to these expert aftercare guidelines, your investment in a semi-permanent tattoo application will yield impressive, lasting results.
Simply Inked Q&A: Your Questions on Perfect Application and Lasting Wear
What is a semi-permanent tattoo?
A semi-permanent tattoo is a type of temporary body art that uses genipin-based ink, which reacts with the amino acids in your skin to create a design. Unlike traditional tattoos, it is not permanent.
How long can a semi-permanent tattoo last?
When applied properly and cared for diligently, a semi-permanent tattoo can last anywhere from 8 to 16 days. Its duration is influenced by factors like skin preparation, placement, and aftercare.
What should I do to prepare my skin before applying a semi-permanent tattoo?
Before applying, thoroughly cleanse the skin with a mild, oil-free soap or alcohol wipe to remove oils and residues. Gently exfoliating 24 hours prior and shaving any excess hair 12 hours beforehand can also improve adhesion.
Does the tattoo appear immediately after I apply it?
No, the full color of a semi-permanent tattoo develops gradually over several hours, typically taking 24-48 hours post-application. It’s important to avoid moisture and friction during this initial curing period.